Hey all! It's been about a week, during which time I have had the opportunity to practice creating textures with my new Prismacolor markers and colored pencils. I'm having a blast with these, and I can't wait to improve and keep practicing! Lemme show you what I've made so far.
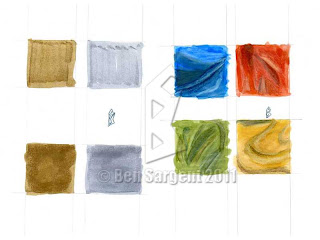 |
| Starting out: Learning the marker - For our first assignment, we were attempting to get used to how our markers work. The four squares on the left were the first part to this assignment. First, we practiced what's called the "venetian blind" technique, which you see demonstrated in the top two squares. Next, we learned the "side-by-side" technique, which is displayed in the bottom two squares. Both have their pros and cons, though I'm partial to the venetian blind. The next part of the assignment involved mixing the markers and the colored pencils to create effects. I like how all of them turned out, though I think the yellow design is probably the best. |
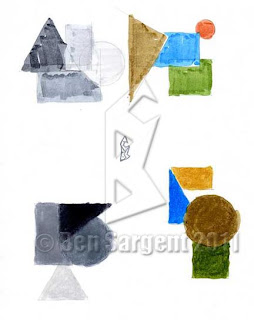 |
| Moving on: Shapes and grayscale - This next assignment taught two different things. First, it helped us figure out how to use our markers in different types of shapes, from circles to triangles and squares. Secondly, we were able to see the difference between grayscale markers and color markers, which will be quite useful later on. |
 |
| Going 3D: Creating a tri-tone cube - This assignment was useful in teaching the differences between shading with markers and shading with pencils. The cube on the left was shaded with only marker, the cube on the right has a base marker layer shaded with colored pencil. Not quite as clean as I hoped, but it was a good experience. |
 |
| Creating texture swatches - This assignment was more difficult than the previous ones, but was also more rewarding. First, we had to create 4 square swatches of texture using marker and pencil: metal, stone, wood, and brick. Then, we had to create 2 tri-tone cubes with textured faces, one with wood and one with stone. I'm most proud of the brick swatch and wood block; I think they really work well. |
Well, that's all for now! I'll update again soon!
Until next time.


No comments:
Post a Comment