Hey everybody! Ben here! As you may or may not know, this session I am taking a Computer Modelling/Animation course! Get excited! :-) This is the class I've been looking forward to for this entire session, and already I'm loving it. I'm using Autodesk 3Ds Max for the software, which is extremely similar to VIZ, which I used to create my
Ace of the Air animation in high school. Needless to say, this gives me a bit of an edge when it comes to completing the tutorials for the class.
For the past week, I've been experimenting with the software and completing the tutorials provided by the instructor. Attached are the final results of these exercises, complete with a description of the major tools used to create them.
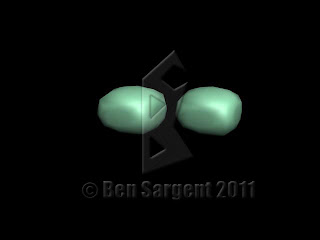 |
| Spherical boxes - This exercise introduce the class to the Edit Mesh tool. Using Edit Mesh, animators can take control of the individual vertices, lines, faces, or polygons of an object and manipulate them to change the shape of the original object. In this assignment, we changed a box to a sphere-like shape using the Edit Mesh tool. |
 |
| Apple - This exercise continued using the Edit Mesh tool, as well as introducing a tool called MeshSmooth. The latter tool can be used to reduce the number of jagged edges created by editing the mesh, resulting in a nice, rounded shape. The exercise called for us to edit the mesh of a sphere to create an apple-like shape, then use MeshSmooth to get rid of the jagged edges. |
 |
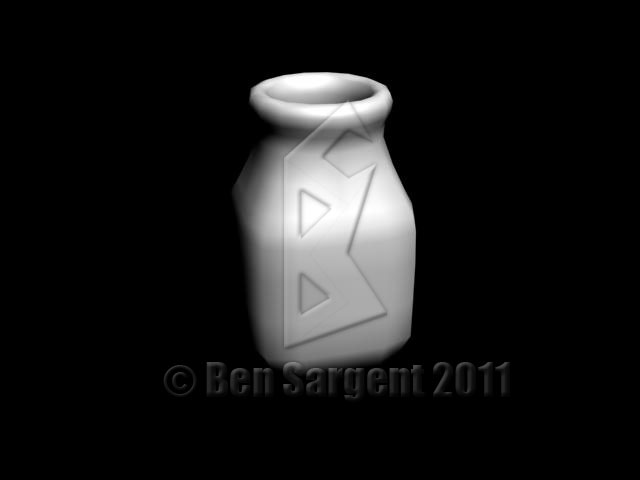
| Milk Bottle - This exercise continued to use the Edit Mesh tool while introducing the Extrude tool. The Extrude tool is used to take a two-dimensional object and give it volume. In this exercise, we took the top face of the original box and extruded it, creating new shapes that could be scaled down to what we needed them to be. After we created the rough shape of the milk bottle, we added a MeshSmooth modifier to make it rounded and pretty. |
 |
| Extruded table - This exercise continued to teach us about the Extrude tool. Creating a rectangular box, we used the Edit Mesh tool to move the individual "steps" of the rectangle (the structures that give the object its shape; think wireframe) to new locations, which then were extruded and used to create the "lip" under the table and the four legs of the table. |
 |
| Bowl - This exercise introduced us to the Lathe tool. This useful tool can be used to take two-dimensional shapes (called "splines") and extrude them around a central pivot point, creating a 360o object. For this project, we used the Line shape to create the basic shape of the side of a bowl (from the center to the edge), then used the Lathe tool to rotate the shape around the exact center of the object. |
 |
| Lofted Table - This exercise introduced us to the Loft tool. The Loft tool can be used to create compound objects out of basic shapes. For this project, we created the tabletop like we had in the previous assignment, then created the legs using the Loft tool. To do this, we first created a square and a circle for our loft guides. Then, we drew a line and used the Loft tool to add first the circle to the line (which created a cylinder) then the square (which created a cylinder that morphed into a rectangular prism). From there, we manipulated the position and number of the shapes to create the table legs seen here. |
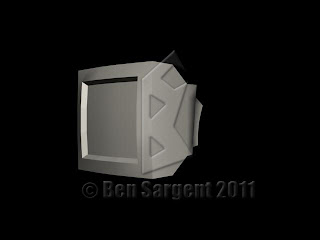 |
| Computer Monitor - This project introduced us to the SoftSelection tool. This tool works similarly to Edit Mesh, except that it affects the vertices (or whatever type of modifier you are using) around the selected vertex to some degree. The so-called "falloff" of the SoftSelection tool can be increased or decreased, depending on the situation, and can be used to create slightly rounded objects effortlessly. |
 |
| Lamp - This project is similar to the table in that it used the Loft tool quite liberally. In addition, this project required us to create several different pieces of the lamp (the base, the lightbulb, and the lampshade) and put them together manually. |
Can you tell I'm having fun with this class? I hope it shows. From here on out, it's going to get even more fun and complicated!
Until next time.


No comments:
Post a Comment